Installing a Razuna Rendering Server
A Razuna Rendering Server can act as a separate machine that will be used for transcoding all your assets. The Razuna Rendering Server can be located within your local network, on a virtual machine, as a virtual server in the cloud (Amazon EC2, etc.) or wherever it fits you best. The Razuna Rendering Server works with all storage options (Local or Cloud Storage).
Requirements
In order to run the Razuna Rendering Server you need to install the following:
- A J2EE server (Tomcat recommended)
- Java installed (Java 6.x or Java 7x is supported)
- ImageMagick, Ghostscript, FFmpeg, Exiftool and other libraries (see the Installation Guides how to install them)
- GIT installed
- A centralized database for your Razuna installation (Razuna and your Razuna Rendering Server(s) need to be able to connect to it)
- Optionally you can install Apache (but not really needed)
Get the Razuna Rendering Server application
The Razuna Rendering Server application is an additional application that needs to run on top of your J2EE server. Customer with a valid license can get the application from us. To install the application navigate to the folder you want to install it (usually the webapps folder) and copy the application in this folder.
Once done, you should restart the Tomcat server. You can test if the application is running successfully by going to the application directly in your browser with http://dnsname:8080 (or IP address). If successfully you should see something like the screen below:

If successful, please continue on to setup your database.
Database setup
The Razuna Rendering Server needs to be able to connect to your central Razuna database. Thus you need to setup the database connection within the Application Engine of the Razuna Rendering Server. The Application Engine has a Administration interface which makes this task quite simple. Navigate to http://yourdomain:8080/bluedragon/administrator/ and enter “admin” (if you have not changed it) as password.
Navigate to “Data & Services” and then “Datasources”.

Within the “Datasources” add a name for the datasource (remember it) and choose the Database type of your Razuna database.
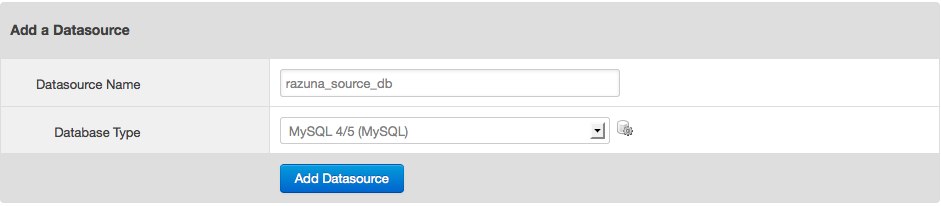
Click on “Add Datasource”. In the following screen enter all the parameters to connect to your database. Make sure to use the same user as your Razuna user. Under “Show advanced settings” enter additional parameters your database might need.
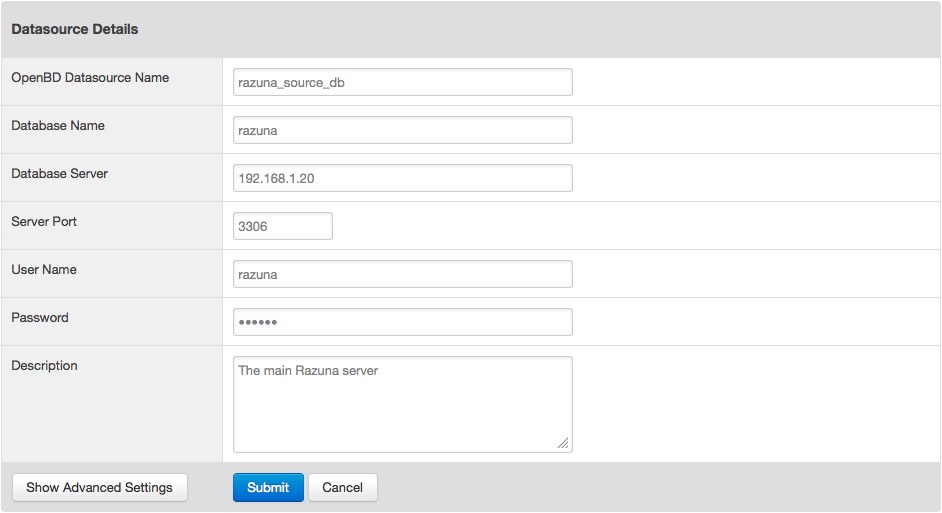
When all parameters are entered click on “Submit”. The Administration will attempt to connect to your database and will report of the connection. If it fails, make sure to have all needed information. Do not continue until you can connect to your Razuna database successfully!
Edit the config file
The above “Datasource Name” needs to be applied to the Razuna Rendering Server. To do so, navigate to the root directory and edit the config.ini file. Edit the file so that the datasource name (the name you entered for the datasource above. This is NOT the database name!) is entered into the datasource= string in the config file. This should look like this:
; Setting default values
[default]
datasource=yourdatasourcename
Restart the Tomcat server to apply your setting!
Enable the Rendering Farm option in Razuna
In order for Razuna to use your rendering farm server, you will need to enable the server in the Razuna Administration. Please read Enable the Razuna Rendering Farm to do so.